install.packages("usethis")
install.packages("gitcreds")Computing setup instructions
Computing in Sociol 333
This page will introduce you to the course computing workflow. We will set up everything you need in order to start using R, RStudio, Git, and GitHub–four powerful programs that you will be learning to use to analyze data in this class.
R is a programming language, like Python, C++, Java, and many others. That means it can be used to do all kinds of things. Its primary strength, however, is data analysis, and it is used by many social scientists, statisticians, data scientists, and others to clean, model, transform, and visualize all kinds of data.
RStudio is an interface for using R--basically, a nice text editor with bells and whistles that are specific to writing code. There are other ways to write programs in R, but most people use RStudio because it is both powerful and free.
Tip
R is the name of the programming language itself and RStudio is a convenient interface.
Git and GitHub are the collaboration and version control system that we will be using throughout the course. They can be used for any kind of file–not just R. It is likely you’ll run into them if you ever do any work involving writing code that needs to be made available to others.
Tip
Git is a version control system (like “Track Changes” features from Microsoft Word but more powerful) and GitHub is the home for your Git-based projects on the internet (like Box but much better).
Today, we simply aim to get these four tools set up and talking to one another.
The good news: All of this only needs to be done one time–after this, you’re set not just for the rest of this class, but for whenever you use these tools again in future!
The bad news: It’s a tedious and nonintuitive process. If you find it frustrating and/or confusing, it’s not just you. Stick with it, and ask when you get stuck–we will take as much time as necessary to make sure it works for everyone.
Goals
By time you go through the steps on this page and in the tech setup repo that it pairs with, you will…
- Have a functioning R, RStudio, Git, and GitHub setup
- Have an introduction to our course workflow using R, RStudio, Git, and GitHub
- Gain practice writing a reproducible report using Quarto
- Practice version control using GitHub
Getting set up!
I recommend you find someone with the same operating system as you to work together on this with.
Part A: R and RStudio
Step 1: Download and install both R and RStudio
Those links again:
Download R: https://cran.r-project.org/
Download RStudio: https://posit.co/download/rstudio-desktop/
Follow the prompts your computer gives you to install both programs.
These instructions might help if you get stuck.
Now open RStudio. You should see a screen that looks something like this:
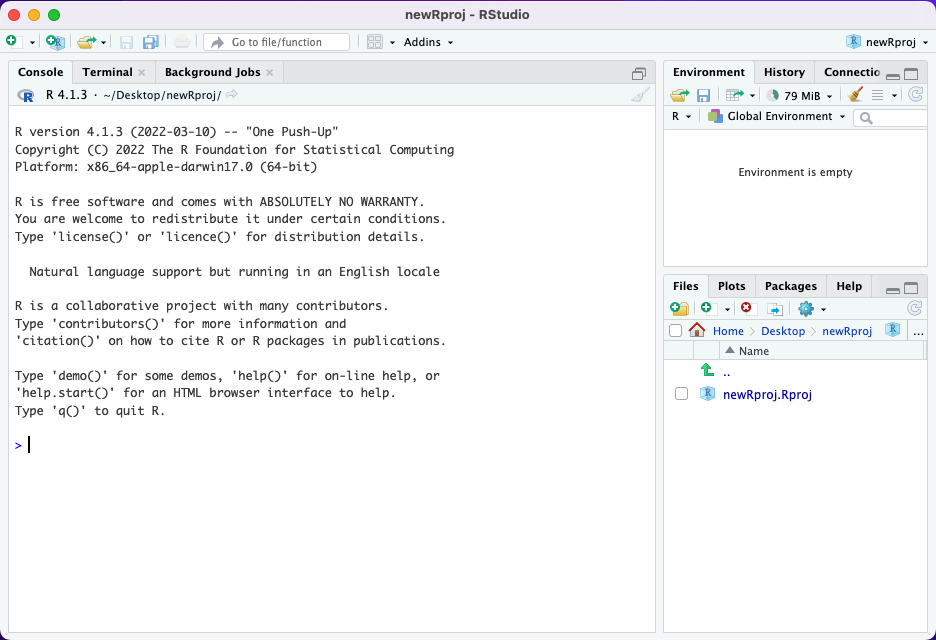
We will go through what the different pieces of this interface are in more detail another day. For now, all you need to know is that the box on the left hand side labeled “Console”, where the blue > is, is where you will be copy/pasting and running the code that is given to you in the next sections.
Step 2: Install some packages
You will need a couple of what are called “packages” to complete the rest of these steps. Packages are basically bundles of code that people write and release that make it easier to do specific tasks in R.
Copy and paste the following code into the RStudio console. Then hit enter.
Your computer might take a few moments to download and install the required code. Then you should see a message in the console saying The downloaded binary packages are in, followed by a file path. This means the installation worked.
Part B: Git and GitHub
These instructions are adapted from the How to Set up Git section of this webpage. That page contains some videos that might help you if you prefer learning that way–but know that a couple of things are slightly out of date.
Step 3. Do you already have Git?
Open RStudio. Look at the console (left hand window). You should see another tab right next to the word “Console” that says “Terminal.” Click on this. In the terminal window, paste the following code, then hit enter:
which git
Note
The console sends instructions to R. The terminal, on the other hand, sends instructions to the operating system of your computer. The terminal is often used to install and update things and create/delete/move files on your computer.
This checks if you have git installed. If so, it will show a file path–on a mac, something like /usr/local/bin/git. Congrats, you’re good to go! Move to Step 5.
If instead you see something like git: command not found , you need to install git. Proceed to Step 4.
Step 4: Install Git
The process varies somewhat by operating system (mac vs windows vs linux). I recommend following the appropriate instructions here.
Step 5: Configure Git
Paste the following code into the RStudio console (you may have to click back into the console if you are still in the terminal from Step 3), edit it to contain your GitHub username and email address, then hit enter.
usethis::use_git_config(
  user.name = "Your_GitHub_username",
  user.email = "your_github_email@example.com"
)
Part C: Connect R/RStudio to Git/GitHub
This is adapted from the Connect RStudio and GitHub section of this page (same as above).
Step 6: Create a Personal Access Token on GitHub
Personal access tokens are like passwords–they allow GitHub to make sure that it really is your computer that is trying to modify things in your account. Here you’ll create a token in GitHub. Then in Step 7 you’ll provide the same token to R. Then the two will be able to communicate with one another.
Enter the following code in the RStudio console and hit enter:
usethis::create_github_token()This will take you to the right page on GitHub. Enter a description. Make sure you change the expiration to be longer than 30 days, so that everything will keep working at least until the end of this course. You can leave all other options at their default values.
Then copy the token GitHub provides you to your clipboard. It is best to leave this window open until the next step is finished so that you can re-copy this if needed–if you lose it, you will have to create another one.
Step 7: Store the personal access token to connect R/RStudio and GitHub
Enter the following code in the RStudio console, then hit enter:
gitcreds::gitcreds_set()Enter the personal access token you copied in Step 6 when prompted.
Part D: Testing your new setup!
Step 8: Clone the test repo & start a new RStudio project
Everything should now be set up! Now, we’ll test whether it is working correctly.
Go to the course organization at https://github.com/soc333-sum23. Click on the repo called tech-setup-yourname. You will copy these files to your computer (known as “cloning”), make a change, and upload your changes back to GitHub (known as “pushing”) to confirm that everything is working correctly.
Follow the “How to clone a git repo” section of these instructions to clone the repo so that you can open its files in RStudio.
In RStudio, click tech-setup-test.qmd in the files pane (bottom right) to open the template Quarto file.
Follow the instructions in the file to make a change and commit it.
This isn’t working…
- If you get stuck, come talk to me.
- Depending on your setup, it may be simpler to access RStudio through containers. Containers allow you to code through a browser, meaning you can skip all the downloading steps (though you still must connect RStudio and GitHub). See these instructions for how to set this up.